Saturday, 15 September 2018

Dracula's America


Before I get into the piccies and broadly what happened, can I just say that the game is delightfully fun. The mechanics are solid, setting the turn order using playing cards adds a nice touch of random (and the chance to occasionally trump the turn and get to go first) and losing models is actually surprisingly difficult (right Tank? Right?) which keeps all the players in the game.

Claremont

McBeth, Tank Engine and I set out this weekend to teach me how to play DracAm in Tank's lovely little Old West town of Claremont.

Tank's Plains Indians, my Crossroads Cultists and McBeth's Damned Confederates were all trying to sneak our loot off one of the other player's deployment. We deployed, rolled up our ulterior motives and set to work.
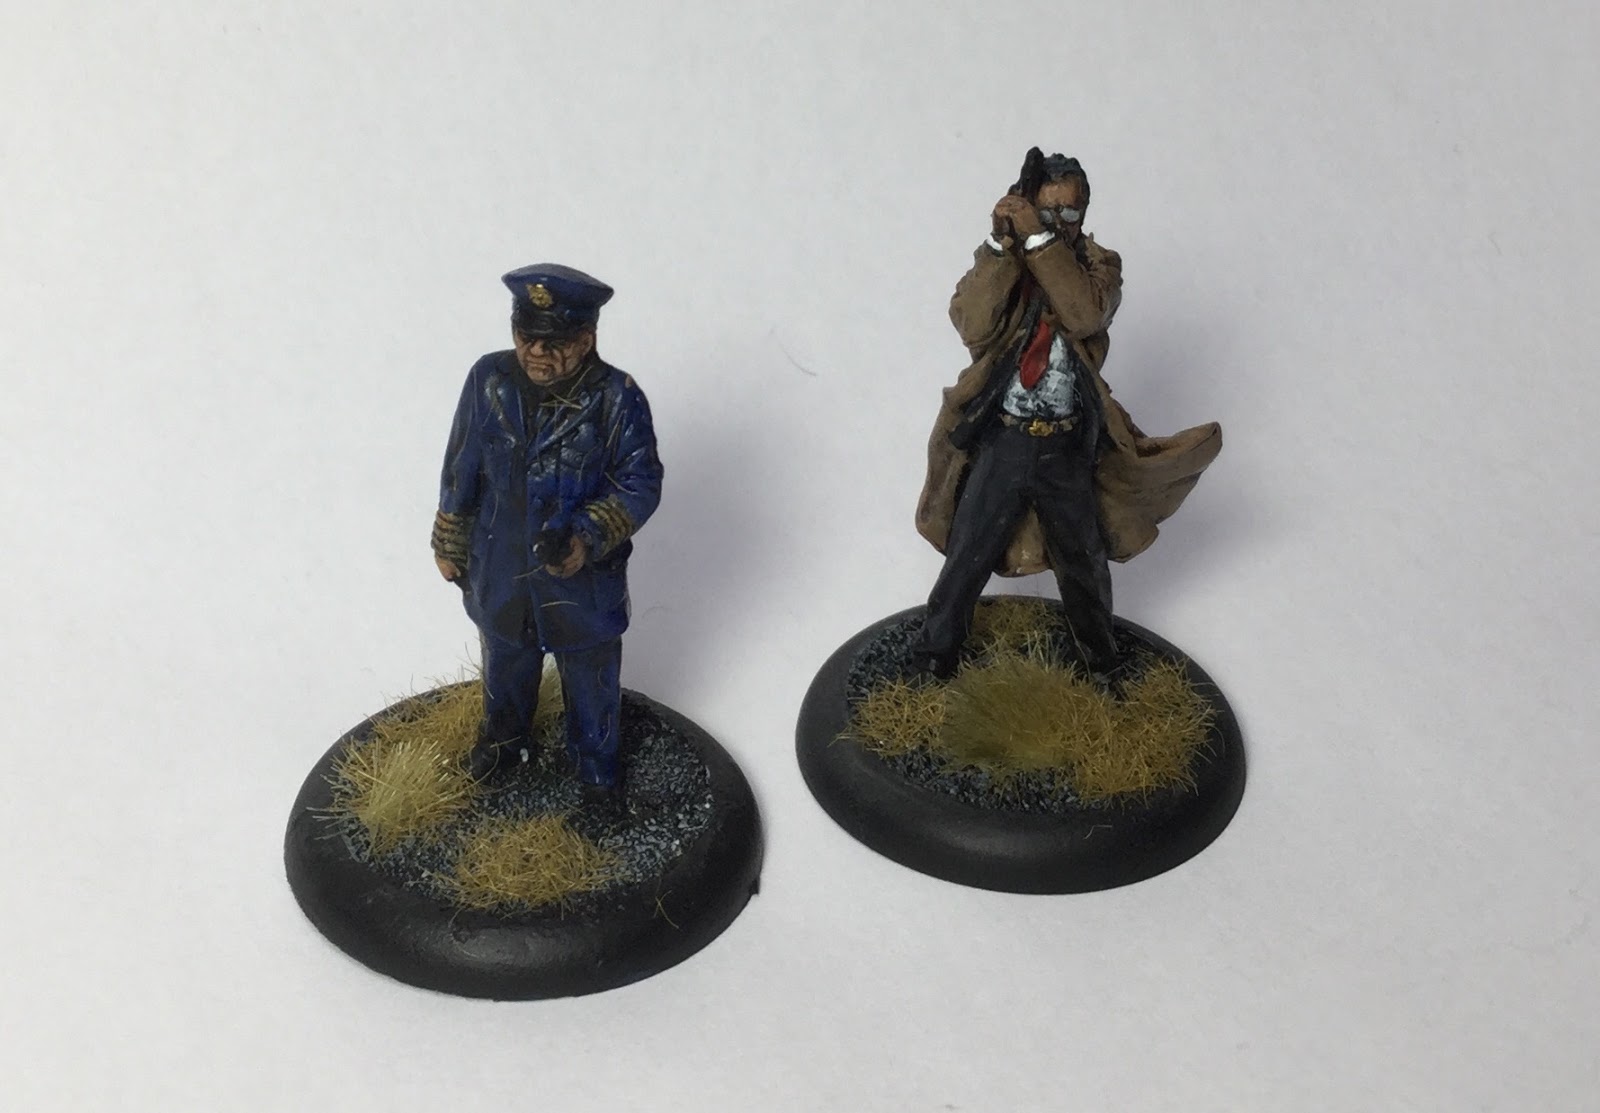
Cultists! 
Indians!

Town was unprepared for the drama that was to descend upon it, with the local barkeep having met the Stage and a well-to-do lady visiting Claremont.
Impending drama
The Confederates came from the North West, the Indians from the South West and the Cultists from the East. The Confederate ghostly gunslinger made his way into Main Street and scared off the Chinese prospector!
The Confederates arrive
The Crossroads Cult began by summoning Greeblies to attack the town. The small 'Hellhound' was summoned almost every turn and the big scary Behemoth discovered the slow walk across town was going to take him a while!
Greebly!
The Indians played the board edges and while one of their Skinwalking Wolves was shot down by a Confederate Zombie (I refer you to last weeks comment about McBeth and rolling 6s) the rest snuck up on the Cult.
Indians sneaking up to Main Street
The small 'Hellhound' ran into Main Street and took the first of the Cults two hostages, who was promptly shot down by the Conferedate ghostly gunman. The hostage, not the Greebly. The Greebly took another hostage and attempted to close with the Indians leaning to this scene:
Post-Greebly Hostage Taking
Turns out a Greebly with a hostage is no match for an Indian with a rifle. This was rather the story of the game, as both mine and Tank's shenanigan creatures were repeatedly gunned down by basic six-guns. At least I could keep summoning mine although it did impact on my team performance since it chewed up three actions a turn to get both the Greebly's back in play and it meant my Summoners barely left their deployment zone!
Angry Greebly is Angry
Some intense gunfighting between the Cult's Bandito allies and the Indians led to one very angry Indian shooting like a boss and gunning down a small Greebly basically every turn.
The Anti-Greebly Indian
Much despair was had as we hadn't managed to throw down identical cards to get a supernatural event! When we finally did, it turned out Rogan's Bar was haunted and a man who summons demons for a living ran off while his demonic ally stood there and cowboyed up!
A Spirit scares off the Chief Cultist but not his Harbinger Friend

McBeth took the game in the end, 10 VPs to Tanks 2 and my 1, which was a good win for him - he made the most of his advantages while Tank and I spent a lot of time figuring out what ours didn't do well. The after game is a hoot - not as dependent on your in game performance as after games in classic Necromunda or Frostgrave. McBeth has taken a big lead in cash, and will probably maintain his numerical superiority (zombies aside) but Tank and I have both picked up some slightly better dudes and a bit more of a clue about how our crews are supposed to work so that should balance out.

More DracAm is definitely on the cards. It's a nice shift from regular cowboys and the supernatural offers a really nice little tweak on the well known cowboy tropes.

Next time: 
My chunk of the crew for our 40K Wrath and Glory canned adventure and a few other 40K goodies I've finished recently. There might even be a small TY preview if you're lucky and I'm organised.

Sunday, 9 September 2018

Nananananananana.....

BATMAN!!

One of half a dozen possible Batmans (Batmen?) from the BMG.
Unusually for the denizens of this blog, someone (Pooch) talked me into playing Knight Models Batman. Pooch collected a Joker crew and so, while in a city with a decent game store or two a couple of years back, I picked up a few bits. We played some games and my small Brave and thre Bold crew went down in a screaming heap. I needed more options.

ARROW'D! 
Tank Engine, and a profoundly cheap sale at an online store, got me the bits I needed and one I particularly wanted. More cops, more SWAT and Hawk Girl, the sassiest of superheroes, especially when it comes to mocking the hell out of Bats.
Bad Cop, Good Cop

GCPD Detective and Lt Brandon

GCPD Beat Cops
How do I like BMG? Very much. I mostly prefer the heroes in the MCU, but there are a few gems in the DCU. Hawk Girl, Green Arrow, Huntress and others who aren’t quite so painfully moralistic or serious in their portrayals. So playing a Batman crew was actually an option. The fact that I can chop and change my Boss and Sidekick mix from a choice of Batman, Green Arrow and Jim Gordon (and Arsenal as well) and then fill out the crew with the GCPD is really sweet. If I focus on the GCPD, I can look to Huntress, Hawkgirl or either of the Arrows to fill out the force with the superhero goodness it needs to be sweet.

Two of the Three Birds of Prey
The game involves allocating your actions and prepping your turn before following it through which makes for a really interesting tactical challenge - making the most of your resources is a known challenge.

It has some neat little features, very fitting with the Batman vibe - the game is always played at night, so guns don’t dominate (and a good thing too as they fricking hurt), the heroes are generally trying NOT to kill people and the winning of the game is about achieving objectives - like turning on the Batsignal or solving Riddler puzzles - alongside taking out the foes who are preventing this.

What don’t I like? Only the layout of the rulebooks, their lack of an index and the occasional obvious gap in the rules (can you move out of combat?) However, you can download them for free so that definitely helps.

Overall, it’s a sweet game and, now that the SWAT cops are painted, it is all on.

Next time:
Pictures and a recap of my first game of Dracula's America with McBeth and Tank. It was great  fun, with some interesting strategic depth and, without giving too much away, let's just say McBeth will do well while we're mostly rolling D6s.

Sunday, 2 September 2018

A few construction projects

Honestly, I'm trying to get back into the habit of this. I've not been spending a lot of time with the brushes in the last little while and have been looking for a bit of inspiration. I'm hoping getting back to blogging about the things I'm working on will be it.

So a couple of the magpies got into their heads that given we have been known to play Dead Mans Hand and In Her Majesty's Name, we should probably look at Dracula's America as well. After a read of the rules, it looks very cool, so I set about pondering what I could do with my existing collection of Mexican banditos and peons. I had a couple of monks floating around that looked like they'd make good cultists (a robe is a robe right?) with a bit of a repaint, but to play Crossroads Cult, I needed a Harbinger - a demon who takes human-ish form to 'help' the Cult summon demons. Cue some spare Ungor horns and a giant rat tail provided by Pooch:

NO! You must summon harder! 
My other little project is a GW easy-build Primaris Reiver. I've been meaning to get one for ages and a recent game of Kill Team with Scotty and Pooch convinced me he'd be a good add. It's simple enough to DW-ify - I filed down the right pauldron, till I could slot a normal marine shoulder pad over it and for the left arm, I was looking to replace the shoulder with a normal marine shoulder when I realised that a Reiver combat knife is about the same length as a normal marine's power sword. So I just added a power sword.
Hippity hoppity, where's my property?
He's going to do triple duty - he'll go in the Fortis Kill Team in my 40k Deathwatch army and likely make the field as part of a Deathwatch Kill Team in Kill Team (how many times can I say Kill Team in a sentence?). He will also appear in our groups upcoming canned 40k 'Wrath and Glory' RPG. My little Inquisition collection is producing four of the six PCs. Which reminds me, I better paint a guardsman!

Now, in a feature I'm shamelessly borrowing from Tim over at Tim's Miniature Wargaming Blog (along with his impressive capacity for posting!), I'm going to try putting in a next time thing to make me actually post something.

Next time: 
Some piccies of my recently completed Batman Brave and the Bold crew, complete with Batman, Commissioner Gordon, Green Arrow and a few other comic book faves. And a lot of policemen. A lot.

Wednesday, 8 August 2018

Colours of War paint - a review

Recently I had the opportunity to paint some of the excellent new Flames of War plastic models from Battlefront. As a part of this job, I thought it would be a good chance to try out the new range of paints that Battlefront are selling under their 'Colours of War' range.

The models that I was painting included British, American and German miniatures so there was a good range of colours to try out from pale sand to dark green to panzer yellow. The series of pictures and notes below are from the German section of the painting and are just the guns that I had at that moment.


The two pics above are of the painting queue. A couple of 88mm guns, a battery of 105mm artillery pieces, a quartet of PaK40s and a small platoon of Shermans.


The 88s are undercoated. I used my normal cheap rattlecan black primer spray from Bunnings. I use British paints Flat Black as it does give a very good flat finish and for only NZ$10.


So, the paints. Here is the Colours of War 'Panther Yellow' with the other two paints that I would use for painting German equipment from the Vallejo range, Middlestone and Green Ochre. Firstly, the colour consitency of the CoW paints is very good. When matching them against what I think is the classic German yellow, it does look the part. The same goes for the 'Sherman Drab' - it has, IMHO, the right blend of green, grey and yellow to the colour that matches what a well used Sherman would look like. For the Pantehr yellow, the Middelstone is too green and the Green Ochre is too yellow (oddly!).

The paint consistency itself is a problem though. The paint seems to have a very gloopy feel to it, much like kids art paint. Adding water to thin it down only disperses the paint into smaller gloops. When doing this though, the colour still stays the same which is great. I found that the paint bottles need to be shaken far more that what any other brand of paint needs to really mix up the paint and flow agent. Awkwardly, the bullet shaped bottles are fully molded so unlike the Vallejo eye dropper style where you can remove the eye dropper and pop in an agitator to aid with the mixing, you cant remove the head of the CoW bottle to artificially mix the paint.

This all leads to a scenario where to cover the black undercoat you have to put on several thin coats of the colour. And by several, I'm talking about five plus a wash plus another coat or two to even it out!

Below are step by step shots of the 88s getting their main colour added. Forgive the photos!

First coat. With Vallejo or GW paint, normally I'd not need a second coat but obviously here this is nowhere good enough.

Second coat. Still not great.

Third coat. Yay. Looking better.

Fourth frikken coat. At this point I was ready to gouge my eyes out, but have a nearly solid colour.

Adding the 'Rommel Shade'
 The washes that are in the CoW range are ok. They flow quite well and take water as a thinning agent perfectly well too. The only thing that I question is whether any of the shades I used were different to each other! The colour for Rommel Shade and Bradley Shade seems almost the same.

Wash dried and to clean up and add more colour I did two layers of the Panther Yellow.

And lastly with an edge highlight of Dry Dust. The photo is ok, but due to the aforementioned eye gouging, I was having issues getting the camera to work.
So not the greatest experience with these paints. I'm pretty sure that if I need to keep using these paints for any commission work, I'd both invest in getting a nail polish bottle shaker and look at doing an initial coat of Vallejo colour to get over the black undercoat. The actual colours of the range are excellent, but as they are so thin and require so much care to get right, using them as the base coat creates a lot more work.

Because I paint a lot of miniatures from a range of companies, I've amassed quite the collection of paint from various suppliers. I prefer to use a mix of Vallejo and Citadel/GW paints as their ranges are good and the consistency of their paint is always of top quality. Would I elect to use CoW paints normally? Probably not.

Below are some shots of the other guns.


Sunday, 8 July 2018

Building Azrael - Part 3

So before I begin, I was debating whether to kind of just abandon what I know about AC130s and painting this in the three colour camo scheme it would have worn in Vietnam. The idea of painting something so big entirely black or very dark green, especially when I'm painting my TY force in MASSTER camo (I know, but it looks SO COOL) did not please me.

But once I'd put the green on, I was umming and ahhing. And then Pooch came to my rescue with a delighful image of an AC-130 with a black underbelly and underwing and a two colour camo on the top. I started with a Brown Violet base with a liberal dose of GW's Nuln Oil over the top to make sure I didn't lose any of the wing panel lines. My dodgy greenstuff work is vexingly apparent. Don't look under the wings!

First camo coat
I settled on two of my favourite paints - US Dark Green and US Tan Earth to do the two colour blobs. The instruction manual for this kit earns some brownie points at this stage for providing a number of different schemes for ways you could have painted the original Azrael in Vietnam.

I followed some of the camo guide from the instructions to put this on as I do tend to find I repeat myself with painting camo if I'm not thinking carefully. Many of my LW StuGs have very similar stripes...

So the camo is as a base coat of US Tan Earth and then a liberal coating of Devlan Magic before letting that mostly dry and carefully removing any pools before they settled into pigment rings.

Then comes the painstaking process of gently drybrushing the camo stripes on without painting in the many, many, many, many panel lines across the wing surfaces.

Finally, decals to finish the plane. The decal set for this kit is really nice and it has an excellent guide of what to put where. It's even cleverly designed that you could put decals on to cover where the weapon mounts would be if you didn't want to mount the weapons. I admit, it's not clear as to why you'd want to, but....
This decal. This. 
Here's the final assemblage:

Getting the wingtip lights on nearly broke me especially trying to do it without getting any glue on the surface of the clear plastic. I failed utterly. But you still get a sense of the red and green wingtips in the right light.

I had to be a bit creative getting the hole for the stand bored in the bottom since drilling a 5/32” hole across a vertically split hull is.....impossible. It’s not the prettiest and requires some seam puttying to make the join a bit more robust around the pin but it’s also hidden underneath so meh.

I am going to have to build a stronger base though, the upright on this one was already flexing under the weight. A proper Perspex rod and base will make for a more stable mounting but this will work in the short term.

Looking forward to getting her on the table. 

Also, a sneak peak of the test M60's MASSTER camo:
I love the way this looks and I can't wait to get a whole army done. It's been a slow progression using Vallejo Model Air (since it comes in the right colours) with a brush but it gives a really nice finish. I'm now pondering what colour to paint the infantry. Sadly MASSTER was never applied to infantry camouflage.


Thursday, 5 July 2018

Building Azrael - Part 2

So when I left you last time, the fuselage was complete and about to be puttied. This time we get from there to a finished AC-130H.

First off, the wings. I hadn’t decided whether to glue on the props or not when I took this. I could just glue on the cones from the prop hub but that might look a bit lame. Gut feeling? The props will go on but it'll be one of the last decisions. Note the missing wing lights. There's actually some clear plastic bits to fill in the forward wing corners but I'll need to paint behind them before attachment to make sure they show up coloured!


The underbelly of this kit is a PITA. It's not abundantly clear from the instructions but if you want to have the landing gear up, then you're supposed to cut out the middle of the fuselage and insert two replacement bits. I realised this far too late and so have made do fitting the panels that would be used to model the landing gear down to instead model it up. Note all the armaments...


One complete plane. This will get primed and then I'll paint the windshield before it's attached. Getting the wings in was an absolute pig. The starboard wing fitted like a glove. The port wing, not so much. I spend a lot of time with the file getting it to a size that slotted most of the way there. Eventually, it didn't seem to matter how much more I filed, I kept feeling like I was going to snap the fuselage so I gave in!


A couple of comments on the kit. It's a nice looking kit, if a little flimsy in places (something that is hardly surprising given the scale) but the instructions leave a lot to be desired. They're clear on how to build the AC-130A but the kit comes with all the parts to get to an H (which is fricking awesome) and I imagine a skilled modeller could get to the J as well by using the wing pylons differently. There's also a snub nose for the Herc which I left off mostly because I couldn't work out where on the fuselage to make the cuts and, well I refer you to my comments above about the landing gear bays...

I do like the fact it comes with a really nice stand that will allow me to use it in a tabletop game and mounted doing the requisite pylon turn. That made me super happy. Speaking of which, here's a size comparison I took of Azrael alongside a Battlefront M60 who will be on table with it.


Overall, it was a fun job to assemble and I cannot wait to get it painted and then drop it on the table when I get my Marines done. I hope it will be the centrepiece of Tank's and my combined Marine force for Panzerschreck 2019 as well.


Saturday, 30 June 2018

Building Azrael - Part 1

You heard it right folks, I’m abandoning my Deathwatch in order to start playing Dark Angels.

...
...

Not really. In fact, I’ve started building a model plane for the first time since 1990-cough. This is a Minicraft Model Kits 1/144 scale AC-130. Why? I hear you ask? Because! I answer, stupidly. I’ll be honest, I love the A10 Warthog. It’s silly. But when I discovered a 1/144 scale Spooky was out there, I had to use that for my TY air support. I reckon that the firepower coming out of the port side of an AC-130 is at least as ridiculous as two GAU-8s.

Azrael was an AC-130A, used in Vietnam. I’ll be building mine as an AC-130H, with a full armament of 2 20mm Vulcan cannons, a 40mm Bofors and the silliest of all, a 105mm howitzer! I’ll probably still use the sweet Azrael decal though. I’m not giving that gem away and looking sweet is a legit reason to do anything!


I didn’t enjoy prepping the holes in the fuselage for all the weapon mounts. Getting a clean edge was challenging at best and I’m still not super happy with how they came out but I think a bit of careful filing and scalpel work and I can clean up the worst of it.


I am going to have to green stuff a few seams and now that I've got the fuselage assembled and here, reader, is where I leave you until next time.


Tuesday, 12 June 2018

Time for a catch up.

It has been a while since I posted and I am a few projects along, probably (SWMBO would say) too many. The latest game on the scene is Blood Red Skies - Warlords WWII Dog Fighting game. I have taken on the the side of the Bosch, bringing the mighty BF 109 to battle. One game under the belt and really enjoying the gameplay and the theme.
Games workshop have been making a come back around the club and I decided to get into Necromunda. I have Orlocks from the previous incarnation and Goliaths from the starter box. The thing that really should me is the terrain - so check out the fabulous TT Combat Industrial terrain so far.
Next is my Space Wolves 40k army - a mix of second hand and new purchases. I had a lot of fun painting this up - not so much fun playing them as everyone else I play has their Codex and all their special bits - but I am sure GW will be true to their Codex creep selves and within a month or so I will have all the toys at my disposal.
Team Yankee 15mm has hooked me in aswell - Marines SEMPER FI! Finding F4 phantoms for air support and Blackhawks for transports has made this project lots of fun - and a great game to boot!
Batman - love the penguin and when I found this model I had to have it and paint it. Yet to play a game but really enjoyed the painting project.
To top it all off here is a selection of other figures I have been adding to the collection - some for Dead Man's Hand, Walking Dead and some for the coolness of the figures.
Last of all I picked up some Zulu's - at some stage we'll find a use for these.
Well that's enough for now - lots more on the painting table to do...